Basic Coordination Skills
 These activities will promote competence in Fundamental Motor Patterns and the priciples behind basic skill development, eg
- Locomotion
- Walking, running, jumping, hopping, leaping, landing.
- Non-Locomotion
- Pushing, pulling, swinging, bending, stretching, balancing, turning
- Manipulation (using appropriate balls)
- Rolling, stopping, throwing, catching, patting, hitting.
Through structured experiences children will develop efficient movement patterns enabling them to participate more successfully in very simple games, eg
- Qualities of Movement
- Principles of Movement
- Motion, stability, gravity, base of support, friction, force, mass, speed, leverage, air-resistance
Discuss This Topic |
Movement Patterns
 Hospital Tiggy
Equipment: Nil
- Name a person to tag.
- Tag below the shoulders only.
- When tagged the person tagged holds the spot “tagged”, while proceeding with the game.
Knee Tiggy
Equipment Nil
- Choose one player to be the “it”.
- “It” chases players around the court trying to tag them on their kneecaps with their hand.
- A tag on the back or side of the knees does not count.
Octopus Tiggy
Equipment Nil
- Usually played with a small group - i.,e., 6 or so, the aim is for players to run from one end of the court to the other without being tagged by the “Octopus” who sits on the floor and attempts to tag the others with arms or legs.
- Once tagged the players become octopuses and must sit down on the spot where they were tagged and help tag other players as they run past. The first tagged will be “it” for the next game.
Chain Tiggy
Equipment Nil
- The tagger chases players and tags them with their hand.
- Once tagged players link arms to form a chain and as more players are tagged the chain grows longer making it harder for players to escape being tagged.
- Only the two players on the ends of the chain are allowed to tag while others must maintain the linked chain.
- If a player is tagged while the chain is broken then the tag is not counted and that player is still free.
- Untagged players can try to run through the chain - i.e., under arms, through legs, etc
Top of the Head Tiggy
Equipment Nil
- The tagger chases players and tags them gently on the top of the head. Stress the “softly” and watch for kids pumping up on the back glass wall and hanging on to avoid being tagged or those who manage to stand on the top of the tin.
- This makes it very hard for those players to be reached - especially if the tagger is short.
TailTag
Equipment Tail tag for each player. Use some scrap material as tails, approximately 2- - 30 cm long.
- Children start with tails tucked in to the back of their waist-band. One player, who doesn’t have a tail, is “it”.
- “It” must try to pull the tails out of as many players waistbands as possible. When caught the tails are surrendered to the coach and the caught players help “it” to catch other tails.
Scarecrow Tiggy
Equipment Nil
- The tagger chases players and tags them with their hand. Once tagged players must stand still like scarecrows with feet apart and arms out to the side.
- Players that have not been tagged, can bring the scarecrows back into the game by crawling through their legs and then those players can join in as normal.
- If it gets to the stage where all players are scarecrows, the tagger “wins” and then the firsts player tagged becomes the tagger for the next game.
Balance Tag
Equipment Nil
- Tagger chases players and tags them anywhere (within reason!) with their hand.
- To be “safe” from being tagged, players must perform a static balance on their non-preferred leg with their arm under their preferred leg holding their noses. No more than 3 seconds “safe” time.
Toe Tiggy
Equipment Nil
- “It” chases players around the court trying to tag them on their toes with his/her foot.
- Stress that the tagger must not stomp on toes or you may give them penalty of pushups, etc.
- Note: If you have small numbers participating (i.e., 6 or so), use only one the front half of the court. If a player crosses the short line they automatically take over as the tagger or receive a penalty.
- Try splitting your group and have one half playing Toe Tiggy in the front half of the court while the other half of the group play Knee Tiggy in the back half of the court.
- Then swap.
- Encourage all players to keep moving. Give penalties to those who are stationary or, better still, make them the tagger.
Discuss This Topic |
ActivitiesET Phone Home
Equipment:None
- When tagged, children freeze with one finger pointing skywards.
- To re-join the game another player must touch their finger and say "E.T. Phone Home".
Leap Frog Tag
Equipment: None
- When tagged, children crouch down in a huddled position.
- To re-join the game someone must leap over them.
Copy Cat
Equipment: None
- Children are paired on the opposite side of the room facing each other.
- Call out actions for children to do, eg. "3 arm spins".
- A would run across the room to B, link elbows for 3 arm spins, perform the action and run back.
- When A had returned B would copy the actions of A perform 3 arm spins and return to his position.
- Use your imagination to create other actions such as "High Fives", "Leap Frogs", " Hip Bumps", "Run Around your Partner", "Crawl through their Legs", "Low Tens".
Jump the Rope
Equipment Long rope with old boxing glove or filled sock attached. Children form a circle around the spinner.
- They need to anticipate and jump high to avoid coming into contact with rope. If hit, children can either change places with the spinner or go to a special corner to practice some stretches.
Water Skiing
Equipment : Carpet square ; I rope for every 2 students.
- Students in pairs at one end of the court.
- One partner "water-skis" using the inverted carpet square like a ski and holding one end of the rope.
- The other partner is the "boat" and holds the other end of the rope.
- The two partners work together to travel down the court, the skier first sitting, then kneeling, and finally standing.
- The boat must pull strongly enough to counterbalance the skier in the standing position.
- Finding the balancing position is critical to the skier's success.
- With practice and a strong, steady boat, students will learn how to maintain the best balance
- Have the partners switch roles each time they reach the end of the court. Safety tips:
- Students should move up and down the court or in the same direction around a large circle.
- Remind students not to jerk the ropes, but to pull at a steady rate and to go the speed their skiers are comfortable with.
Shower Ball
Equipment: Foam balls - one for each player.
- Divide the children into two even groups.
- Separate the groups using a long rope or markers.
- Everyone should start with a ball and on GO throw their ball into their opposing teams area.
- Any ball that lands within the team area should be thrown back as quickly as possible.
- On STOP all throwing should cease and the number of balls counted.
- The team with the least wins.
- Play the game a number of times with the emphasis on good throwing technique.
On the Bank in the River
Equipment: None
- All players stand side on to the "cut line".
- One side of this line is "on the bank" the other side is "in the river".
- The leader calls out 'ON THE BANK' or 'IN THE RIVER' and the players are required to jump into position.
- A wrong move eliminates the player who can move off to a designated area and perform some stretches.
Jump the Stick
Equipment : Markers, rolled-up paper sticks.
- Divide group into even teams.
- Position a marker 6 - 8 meters in front of each group.
- The first person in each team runs with stick around the marker and back towards the group.
- Running beside the group and holding the stick down low, all the team members jump the stick.
- After reaching the end of the line the stick is passed to the front team member who repeats the task.
Guard It
Equipment : One foam ball and one pin for every child (a pin can be plastic skittles or milk cartoons).
- Children throw balls at other's standing pins while guarding their own. When their pin is knocked down they perform an exercise as designated by the leader such as 5 sit-ups or 8 push-ups.
- Children return to the game when they have completed their exercise.
Rob the Nest
Equipment: Hoop, 9 balls 4 Teams of 4, 5 or 6 players.
- Number each player.
- Each team has a nest. Centre hoop contains 9 balls.
- Leader calls out one number.
- The object of the game is to get 4 balls into your teams next.
- Once balls in the middle have been taken players may "rob the nest" of others.
- Rules:
- No guarding by other team members. Only take one ball at a time.
- Hockey
- Equipment : Rolled up paper with court marking tape wrapped around.
- An old football or sock filled with foam balls. 4 Cones.
- Two cones at each end of the court form a goal area.
Parachute
Equipment: Parachute
- Establish a method of lifting the parachute into the air - one two UP. Practice taking the parachute into the air. Around the outside - number the children 1-4.
- Everyone lifts the parachute into the air.
- Call out a number, those children run around the outside of the circle back to their positions
- Through the middle - using the same numbers, children run to the centre of the parachute and return to their positions.
- Fan the middle - call out a number, those children run to the centre of the parachute and lie down on the floor.
- The rest of the children create waves with the parachute to cool them down.
- Make a cubby - take the parachute up and pull it behind everyone's back. Sit down on the edge to form the world's biggest cubby.
- Tell jokes, crawl across, have a chat. Squash the mushroom -
- Number the children or use T-shirt colours to establish groups.
- Lift the parachute and quickly hold its edge to the ground.
- A big mushroom shape should be formed.
- Call out a group to "squash the mushroom".
- Warm children not to dive onto the parachute thinking it will support their weight.
- Popcorn - Place foam balls onto the parachute. Start to cook the popcorn. Slowly at first, then move vigorously.
- Have a number of children to retrieve the exploding popcorn.
- Release it - Lift the parachute. Take three steps towards the centre and release it on the teachers command.
Relays
Equipment Nil
- Relay races are great fun and are a good way to get your junior players working hard without them realising it!
- Divide your group into teams of no more than five (so they are active as much as possible).
- Vary the lap activities to suit your juniors ages.
- Variations include: Normal running, backward running, side stepping, hopping, skipping, jumping, bounding, crab crawling, jungles (where a particular animal is chosen and players must mimic that animal, noises included!), etc.
Ankle Soccer
Equipment Soft Basket Ball for each team.
- Group is divided into two teams and using a soft basketball type ball each team tries to kick goals (which are at each end of the court).
- Hands must remain around ankles, watch out for head butts!
Poison Ball
Equipment Large Soft Ball
- Nominate two players - one to stand at the back door of the court, the other to stand in the middle of the front wall.
- All other players stand across the middle of the court.
- A large soft ball is thrown low (below knee height) or rolled from end to end trying to hit (poison) players on the way through.
- Once out or “poisoned”, players stand along the side walls of the court and help throw the ball until all players are eliminated.
- The first two people out start on the ends for the next game.
Poison Ball Variations
Equipment Ball
- Freeze Introduce the call “Freeze” where the ball is thrown from a player at one end and caught by the player at the other end while both call freeze.
- This gives the people on the ends a free shot at the people in the middle while they must remain stationary.
- Wriggles Introduce the call “wriggles” where players in the middle can call “wriggles” if a “freeze” has been thrown.
- This allows the players in the middle to move their arms and legs as long as feet stay on the ground without shifting.
- Bags Introduce “Bags” which are equivalent to free “lives”.
- If a player catches the ball when it has been thrown from either end they receive a bag” or “life” so that if they are hit they get a second chance.
- Players who have “bags” may give up one to bring a friend, who is out, back into the game.
- Tip: It is best to put a limit on “bags” allowed or else the game may go on forever.
Keepings Off
Equipment Large Ball
- Divide the players into two groups or teams.
- The idea of the game is to pass the ball to players in your own team keeping it off players in the opposing team.
- The team with the most passes wins.
- Variations: The ball can only be passed by bouncing or being thrown off a wall or the floor or anyone deviating from any rule receives a penalty - i.e., tuck jumps, sit-ups, pushups or the like.
Monster on the Loose
Equipment: All players have a ball.
- They bounce the ball non stop for as long as possible, moving about the court. If a player loses control of the ball they call ‘monster on the loose’.
- All other players run and try to reach front wall before being tagged by the “monster”.
Signals
Equipment: All players have a ball.
- They bounce their ball continuously anywhere in the court, listening for the coaches signal “GO” means start, “FAST” or “FASTER”, “SLOW” and whistle means “STOP”. On “RUN” all players bounce balls to the “safe zone”- either service box.
Discuss This Topic |
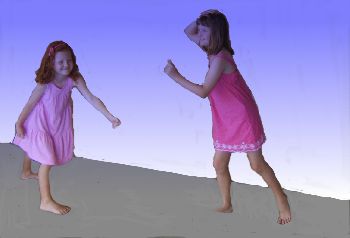
Partner ActivitiesBack to back
Equipment Nil
- Pair up players with someone of a similar build.
- Players are back to back on the floor with arms linked tightly and attempt to stand up without breaking the link in arms or falling over.
Face Slapping
Equipment Nil
- Pair up again with players facing each other.
- Player A uses their right hand to hold player B’s left wrist.
- Player B uses their right hand to hold player A’s left wrist.
- The idea is to try to slap/touch your partner’s face with your “free” hand (the left one in this situation) while attempting to stop your partner from slapping you with their “free” hand.
Push-up Boxing
Equipment Nil
- All players on the floor in a push-up position (on knees - not toes) with their partners facing them.
- They have to attempt to knock their partners’ arms out from under them to get their chest/tummy onto the ground to win while trying to defend themselves from the same result.
Toe Dancing Equipment Nil
- Player stand facing their partner. Both players place their arms out straight with hands resting on their partners’ shoulders.
- Players attempt to step on their partners’ toes while avoiding their partner doing the same to them.
Shadow Shuffle
Equipment Nil
- Players in pairs, all facing front wall in a straight line along centre of court.
- The player who is closest to front wall in each pair is the “shuffler” and his partner is his/her shadow.
- The shuffler randomly shuffles, side steps, lunges to either the left or right side of the court, often quickly changing direction.
- The shadow must try to copy the shufflers every movement.
- Time for 20 - 30 seconds and then swap positions and go again.
- Great for movement and agility.
Discuss This Topic |
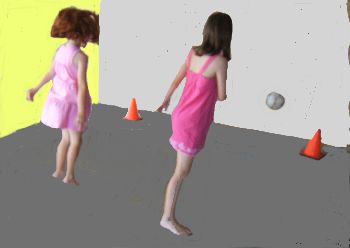
Ball Skills
 Bounce and Catch
Equipment: Racket Ball Ball or Tennis Ball
- In pairs
- A bounces the ball to B
- B catches the ball and bounces it back to A
Drive Drill
Equipment: Tennis Ball or Racket Ball
- 1. Forehand:
- Use a side arm throwing action
- A throws the ball by lunging as if to skim a stone along the top of the "tin".
- B stands behind A, catches the ball and has a turn.
- 2. Backhand:
- Put a ball in a stocking or sock, tie and knot.
- A holds the stocking close to the ball and lets it go aiming as for the Forehand drill. (The action resembles the throwing of a frisbee - sort offlinging the forearm with a rotation action)
- 3. Stand about 1m from the front wall, stand side on, and continually pat the ball onto the front wall.
Service Drill
Equipment: Tennis Ball or Racket Ball
1.Use an underarm throwing action.
- In pairs
- A stands in the Service Box and throws a ball above the "cut" line.
- B catches the ball on the bounce or full and throws it back above the "cut" line.
2. Throw up the ball, about shoulder height, (as if to serve) and catch it in your hand
3. Hold the racket in the right hand, the ball in the left hand, lightly and softly throw the ball up at shoulder height, and catch it on the racket face.
Return of Service Drill
Equipment: Tennis Ball or Racket Ball Ball
- In pairs
- Hitting the ball on the full required an overarm action
- Forehand:
- Use an overarm throwing action.
- A throws the ball above the "cut" line - overarm action.
- B catches the ball and has a turn.
- Backhand:
- Putting the ball in a stocking or sock, tie a knot, now you have something to fling at the front wall to resemble a backhand overhead arm action.
- Lifting your arm well above your head, use a forearm rotating action, aiming above the "cut" line.
Rebounding
Practice the drills on both the forehand and backhand side.
- 1. Throw the ball against a wall.
- Overarm throw the ball to bounce and rebound off the wall.
- Catch the ball by lunging out, and step back.
- 2. Hit the ball against the wall with your hand as many times as possible. Link to Handball.
- 3. Throw the ball onto the wall, let it rebound onto the floor.Catch the ball
- 4. Turn side on. Throw the ball up (as if serving), hit the ball with your hand onto the wall
- 5. In pairs. Two players rebound the ball off the wall at an angle throwing the ball soft and high, then harder.
Note: Control the throw. Alter the distance from the wall/partner depending on the skill level. Watch the ball.
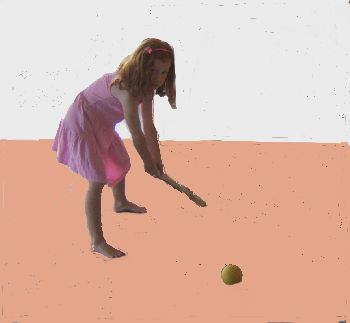
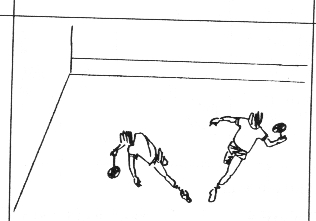
Boast Drill
Rebounding the ball off the side wall/front wall
Equipment: 1 Racket Ball Ball
- In Pairs
- A Throws the ball onto the side wall (about 1-2m from the front wall.
- B stands facing thec orner, ready to catch the ball as it rebounds off the wall.
Note: Watch the height, speed and angle of the throw. By throwing the ball at different heights and speeds it will become easier to anticipate the landing spot of the ball. More Pics... Toss the ball up to hit
Bounce and Catch control the throw
Discuss This Topic |
Racket and Ball Control
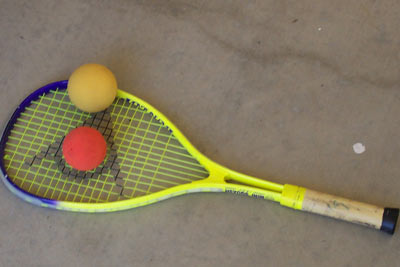 Equipment: Tennis Ball, Racket Ball, Mini Squash Ball or Constant Temperature Squash Ball
- In pairs
- A has the ball
- B has the racket
- A bounces the ball on the floor to rebound so B can catch it on his racket, OR
- Alternately, B can pat the ball for A to catch.
Relay Race
Choose the ball to suit the co-ordidnation level of the student.
Equipment: 1 Racket and Ball each
- In pairs.
- A standing at the front wall, and B at the back wall)
- One person has the racket balancing the ball, and passes the ball onto their partner's racket, who takes off, either walking or running, as if it was a batton in a relay race.
Ups
Equipment: Squash Racket, Foam Ball, Mini Squash Ball or Squash Ball
- Continuous Ball bouncing on the racket
- Bounce the ball up and down on the racket, counting each bounce.
Note: Control the hit. Control the wrist. Control the forearm.
Downs
Equipment:Squash Racket, Foam Ball, Mini Squash Ball or Squash Ball
- Continually bounce the ball on the floor.
- Count each bounce.
- Try to increase the score
Circle Hits
Equipment: 1 Racket, 1 Ball
Move around the court continually patting the ball onto the wall.
Volley Catches
Equipment: 1 Racket, 1 Ball
- Stand 2m from the front wall.
- Turn side on.
- Throw the ball up.
- Volley the ball onto the front wall.
More Pics... Bounce the ball for your partner to catch on the racket
Continually Bounce the Ball on the Racket
Swot Forehand & Backhand Running on the Spot
Swot Backhand Moving Pats
Backhand Hit the Ball on the Volley
Swot Lob Serve
Discuss This Topic |
Balance and weight transfer
- Using your hand as a racket (open the palm).
- Lift your arm up, elbow bent, level with your shoulder (to resemble a backswing).
- Lunge over your knee, imagine hitting the ball with your hand.
- The arm action resembles throwing a stone along the top of the "tin"
Ghosting the Swing
- Put a ball on the floor for a forehand imaginary target.
- Starting at the centre court, approaches the ball, lunges, pauses, balanced and swings (exactly over the top of the ball that is placed on the floor).
- Try to judge the distance from the ball, usually about a racket length away, before swinging, allowing room to lunge and not get to crambed during the racket swinging action.
Shadow Play
- Position two balls, on in the front forehand area, and the other in the backhand back court area.
- Lunge around the court swinging the racket, using the balls as imaginary targets.
- Imagine the ball to be bouncing about as high as your knee.
Command Response
- The Coach/Teacher/Partner standing with their back to the front wall, points to indicate t he direction of the movement as well as the height of the swing required, eg.
- Forehand drive swing ....Teacher points as high as the knee.
- Drop shot swing ...Teacher points to the floor.
- Return of Service (on the full)..Teacher points to a position above the head and at the side of the body.
Co-ordinating feet, arm, wrist and racket
- Skip with the racket in your hand using a chipping movement with the racket.
- Keep the correct grip, wrist firm, and note the "open racket face".
Movement and anticipation
Throw, Bounce, Catch
Equipment: 1 Ball
- A and B stand about 2m apart.
- A bounces the ball to the lefthand side of B.
- B lunges out and catches the ball, and steps back and bounces the ball back to either side of A.
Throw, Bounce, Catch the ball on the racket.
Equipment: 1 Ball, 1 Racket
- A and B stand about 2m apart.
- A bounces the ball to the lefthand side of B.
- B lunges with their racket and catches the ball on the racket.
- B flips/hits the ball back to A.
More Pics... Grooving in the Grip and Swing
Discuss This Topic |